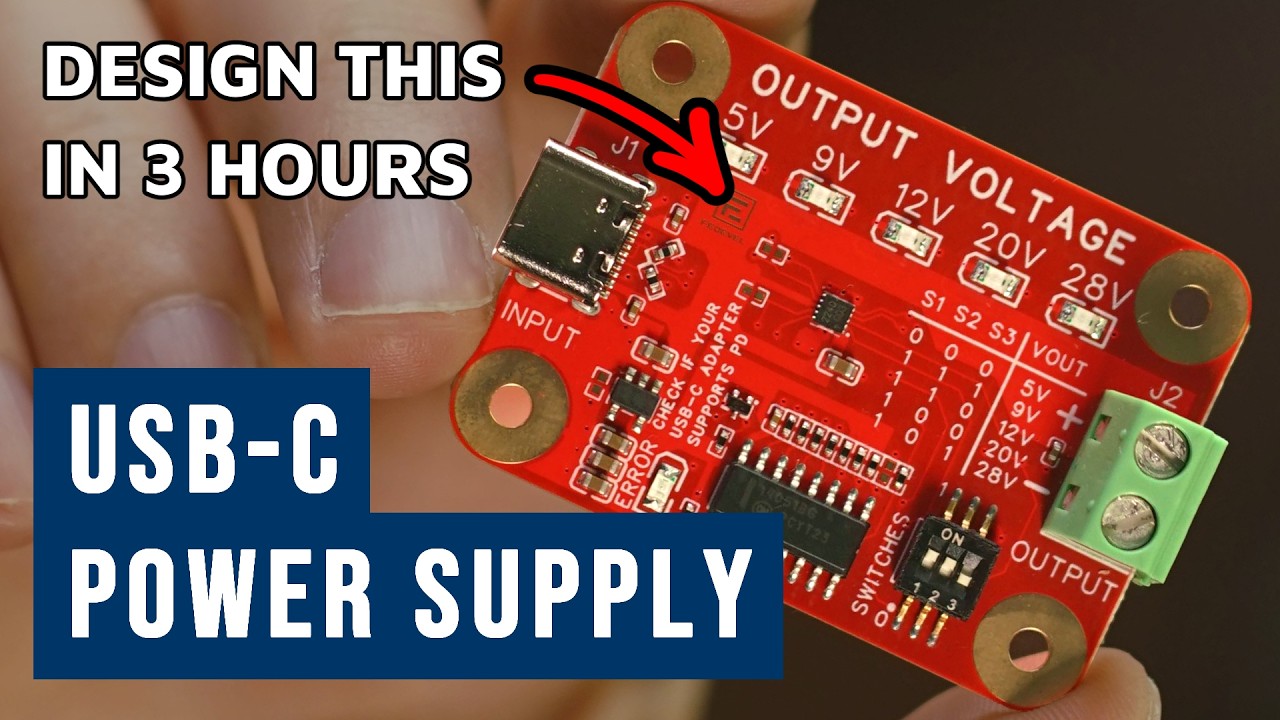
How to Make Custom ESP32 Board in 3 Hours | Full Tutorial
In this tutorial you will learn how to draw schematic, do PCB layout, manufacture your board and programming.
Chapters:
- 00:00Start a new project in EasyEDA
- 04:00Add ESP32 into schematic
- 05:00Add CP2102N
- 05:48Add AMS1117-3.3
- 06:41Add USB connector
- 07:43Add ESD, Transistors, Buttons
- 09:33Add Capacitors
- 14:06Add Resistors
- 18:29Add LED
- 19:12Drawing schematic: Buttons + ESP32
- 25:42onnecting: USB to UART
- 36:19Connecting: LED, Power
- 40:28Connecting: Series resistors, Connectors
- 47:40ESP32 vs S2 reference schematic
- 51:55CP2102N Errata
- 56:23Adding titles
- 59:20Annotating schematic
- 1:00:47Fixing errors in schematic
- 1:02:24Importing schematic to PCB
- 1:03:25Component placement
- 1:20:39Start PCB Layout: setup rules, stackup and route it
- 1:47:50Updating schematic and importing changes to PCB
- 2:07:39Running DRC check and fixing errors on PCB
- 2:11:32Drawing polygons
- 2:21:35Updating tracks to 50OHMs, improving power connections
- 2:28:23Adding text
- 2:41:04Ordering PCB: Gerber files
- 2:42:40Ordering board assembly: BOM, Pick and place
- 2:46:37Ordering additional components
- 2:50:52Boards received! Check them
- 2:52:20Programming: Setup
- 2:53:53Programming: Blink (Example)
- 2:55:03Programming: Controlling LED over Internet (WiFi Example)
- 2:56:32Thank you very much
Links: